I just wanted to leave a little note that I will not be posting at least until late next week. I am in the middle of planning & organizing a 3 day camping trip for my Girl Scouts that will be this up-coming weekend. A few years ago I gave complete control of the troop to them since they were old enough. So they make ALL the decisions. Which, I must say, is torture trying to watch a group of 13 & 14 year old girls decide on anything!!! Anyway, they have done their part, so now it is my turn to make sure all the details are covered.
We are also in the process of getting new cars (new to us anyway), so we have gotten the new cars, but still have the old cars, and trying make sure all the paperwork stays straight, I just have to make sure that nothing gets forgotten.
Anyway, I see I have some new followers which I will welcome properly, once all of this chaos has settled down, but until then... WELCOME.
Monday, April 26, 2010
Tuesday, April 20, 2010
My Very first Glass Containers
I know for most, this is not that exciting, but for me, it was. Ever since I started getting back into miniatures and discovered blogging and found people who liked the same type of miniatures that I wanted to do I have been wanting some little glass jars for my scenes. It all started when I accidentally came across Nikki's blog ( http://nikkinikkinikki72.blogspot.com/ ) "Witch and Wizards Miniatures" and I saw all of her amazing potion bottles and various glass jars that she uses to hold all of her magical body parts. From there it did not take long to discover several other blogs with an astonishing amount of wizard type miniatures that I never knew existed. It was very exciting to know I was not the only other Harry Potter freak (in a good way) who also wanted to recreate some of that world in miniature. I also quickly discovered that most of the people that I love their work are professional artists and making these wonderful miniatures are their full time job. This, for me, is a double edged sword. These artisans do such beautiful work that sadly I cannot afford. Not that it isn't worth every penny, its just not in my budget if my children want to eat. So after a few days of my very own pity party that I was not the millionaire that I ought to be (hee hee) I decided that I would just have to learn how do some of these things myself. They may not come out as good as theirs, but I would give it my best shot. Now come the glass bottles. I have fallen in love with all of the mini apothecary themed scenes that I have seen, so I have decided to do my own. Now, as you know, to do an apothecary, you need glass jars. Lots & lots of glass jars. All different shapes, sizes & colors! So, I have now begun my quest of finding all of these glass jars that I will need. I ordered my first 2 jars from E-Bay from a company in England about 2 weeks ago. It has been killing me waiting for them to arrive! (I do not do well with anticipation! Christmas is pure torture for me! :)) They have finally arrived and all in one piece! I used the photos from their site because I could not take one as well as they did.


But now that I have them, I almost feel bad putting eyeballs or brains in them! They are too pretty!! I am sure I will get over that soon enough, but for now, I just look at them and smile.
Wow, I really did not mean to ramble that much, but I really wanted to explain why I am so excited about 2 silly little jars! Today I have ordered 11 more from a different company. Hopefully they wont take as long to get here. We will see.
Thanks for reading!
Wednesday, April 14, 2010
The Last of the Goodies
Well, this is the last of my State Day stuff. First is the last of my clearance bin finds. It is a small glass & wire container that (to me anyway) looks like the perfect beginning to a greenhouse. The inside dimensions are 6" x 8". It is a little smaller than I would like, but it a great one to practice with. I would like to paint it white & then age it a bit, add an aged brick floor and figure out something for the roof. The sides have plexi-glass panels that can be taken out (easier for painting), but the top is all mesh. I would like a glass roof, but I have to ponder that one for a while.


Next we have our raffle winnings. My daughter and I both put some raffle tickets in and we both were really lucky and won. Hanna (dd) won this very bright, festive outdoor scene which she absolutely adores. She wants to add a few more things to it, then we need to find a case for it.


As for me, I won this lamp. (I know this may be really cheesy, but I have wanted one of these since the early 90's when I was doing miniatures before children.) The base of it is a small room box. You can light just the lamp, just the inside of the room box, or both. The lamps total height is only about 24" tall, so it is not too big. The room box inside is 5" squared. It has 2 windows to peek through, and a door.


This is with the back off, right now it is decorated like an entryway, but I plan on changing that.
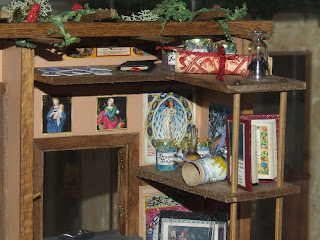
This is the one I thought would make a cute little apothecary.

The whole back wall (where the dresser & painting are) would be floor to ceiling shelves filled with all sorts of potions and such. There is not much room on the other two walls, but I might be able to hang some random witchy things up there. I would also like to see if I can somehow make the light fixture inside MUCH smaller so it is not so intrusive. I would also like to see if I can fix the door so it will open. Right now it is just decorative.


Next we have our raffle winnings. My daughter and I both put some raffle tickets in and we both were really lucky and won. Hanna (dd) won this very bright, festive outdoor scene which she absolutely adores. She wants to add a few more things to it, then we need to find a case for it.


As for me, I won this lamp. (I know this may be really cheesy, but I have wanted one of these since the early 90's when I was doing miniatures before children.) The base of it is a small room box. You can light just the lamp, just the inside of the room box, or both. The lamps total height is only about 24" tall, so it is not too big. The room box inside is 5" squared. It has 2 windows to peek through, and a door.


This is with the back off, right now it is decorated like an entryway, but I plan on changing that.
This is the one I thought would make a cute little apothecary.

The whole back wall (where the dresser & painting are) would be floor to ceiling shelves filled with all sorts of potions and such. There is not much room on the other two walls, but I might be able to hang some random witchy things up there. I would also like to see if I can somehow make the light fixture inside MUCH smaller so it is not so intrusive. I would also like to see if I can fix the door so it will open. Right now it is just decorative.
Anyway that is it for State Day this year. I have plenty of projects to work on & now I have to find some place to find some glass potion jars that won't cost an arm & a leg. I have actually ordered 2 glass apothecary jars that I won on E-Bay, but they are coming from England & it is killing me waiting for them to arrive. Today is the 8th day, so hopefully it won't be much longer. I know when I went to boarding school in England, that packages from home used to take at least 2 weeks, but that was a loooong time ago & the boxes were bigger. :)
Tuesday, April 13, 2010
All My Goodies
Today I am going to post all of my goodies that I got at State Day. The first couple of photos are all of the things that came in the tote bag favors. For those of you unfamiliar with tote bag favors, these are all small little items that people attending the event made or bought 100 of their items to share with every participant there. generally people try to make items that could possibly be used in the project you are there to work on, but not always.

Items as listed: a ribbon windsock, a wooden screen, some magazines, 2 planters, 1 plant, lays potato chips, rubber bands, office folders, office paper, pencil, cat food, clock, coffee creamer& sugar packet, journal, hinges for the door, stamps, mailbox with mail.

A small wooden bench for outside, a flower box, an apron, a small wooden sign with hardware to hang outside of your store. (with room for you to personalize it)
Next are table favors which are ones that you only exchange with the people you have at your lunch table. I gave out my mushrooms to my lunch table people.

Random groceries with grocery bag, a lady bug (on the yellow piece of paper), a small tray for mixing paint, some children's building blocks, a cube with a clip on it, a craft knife that goes around your finger ( I am curios to try this one) in the Altoids tin is a desk set with a desk calender, a notepad, a to do list pad, some post it notes, & a pencil cup with 3 pencils inside, a chair that has been primed to be painted to put into your scene, The last item is in photo below...

This was a gift from the host club for everyone to use, a cup of coffee & plate of doughnuts, the plate says "My Little Corner" across the top & 2010 across the bottom. Very cute.
Next are some items that I purchased. A few of the vendors (there were only 7 or 8) had clearance boxes so of course I hit those first! I got the rocking chair for $3.00 & the set of 4 chairs for $4.00. The 4 chairs are going in the Weasley kitchen. Of course I have to re-paint them & age them quite a bit, maybe break a couple of spokes on the backs, I haven't decided yet. The rocking chair I plan on putting in Molly & Authors bedroom. I really think Molly deserves a rocking chair. One that I am sure she rocked all of her babies in. I also found year two Hogwarts school books which of course you know Had Gilderoy Lockharts books which (again) you know, Molly would own all of them since she fancies him. :)

That is all for now. I really didn't get to purchase much, my budget really wont allow it, but I figure if I get a little bit at a time, eventually (possibly when the house is built) I will have most of what I need.
I have 3 more things to show you tomorrow & that will end my adventure at NC State Day.
Thanks for reading!
Monday, April 12, 2010
Rapunzel, Rapunzel, Let Down your Golden Hair....
This is my next installment of photos from State Day. The following are just random room boxes that people had brought in to share. This first one was my absolute favorite, it is a castle tower top with Rapunzel inside. It was amazing! My photos really don't do it justice.


The side of the tower (the birdbath is from the house next to this one, so just pretend it isn't there)

Close up of the window detail All of the stone work & the shingles were done with paper clay.

inside the tower, I love all of the what-nots on top of the cupboard.


The side of the tower (the birdbath is from the house next to this one, so just pretend it isn't there)

Close up of the window detail All of the stone work & the shingles were done with paper clay.

inside the tower, I love all of the what-nots on top of the cupboard.

Rapunzel getting ready to "let down her golden hair!"

Looks like the woman is making some wine.

This was a kitchen/dining room combo...

Monks in the winery, they are are merry little souls aren't they!


These two are a sample for next years project, it is themed "As Time Goes By". The clock is a working clock & the room box below is made out of foam core & you can make several different scenes for different seasons (for example) and trade then out whenever the mood strikes you. You can also have the clock & scene going horizontal instead of vertical. It seems to have a lot of versatility. I think it would be really fun to do Molly Weasley's clock with all of the different hands....
That is all I have for now. Thanks for looking!
Sunday, April 11, 2010
State Day Continued...
Here are some more photo's of the hosting clubs examples they put out to inspire us on our projects. I will not put all of them on here, but here is a sampling...

This is the front of one of the stores that had the gardening theme I was talking about earlier. I thought I had gotten the inside if this one, but apparently I did not. But at least I can show you the outside.

I loved the door on this one.

This was a cute little doll shop.

This one was a magically themed one.. Very Cool!
 Close up of the inside of the magic shop

bottom half of the magic shop.

This is the inside of the one I posted earlier with the lovely leaded glass windows. 
This was a cute little bakery.

I liked the little garden gnome & mushrooms in this one.

This is the front of one of the stores that had the gardening theme I was talking about earlier. I thought I had gotten the inside if this one, but apparently I did not. But at least I can show you the outside.

I loved the door on this one.

This was a cute little doll shop.

This one was a magically themed one.. Very Cool!


bottom half of the magic shop.

This is the inside of the one I posted earlier with the lovely leaded glass windows.

This was a cute little bakery.

I liked the little garden gnome & mushrooms in this one.
I have finished taking photos of the rest of my goodies which I will post a little at a time over the next few days. I have been having great fun sorting through all of my new finds and planning my new scenes. One of them I know will be an apothecary, and another one will be a greenhouse. I still have yet to decide what to do for my actual project, but maybe if I build it up a bit more it will come to me. Who knows... It it strange how my creativity works sometimes.
Back from State Day
Well, my Daughter and I are recovering from State Day. It was a very long day, but we did have a lot of fun. We got up at 5 am and were out the door by 6. Then drove the 1 1/2 hours to the event. We got there a little early so just took our time checking in & getting all set up. Part of the fun of State Day are the displays that others bring to share. Today I will be showing you some of the samples the hosting club members brought for the project we would be working on at the event. Most of these are take through the plexi-glass cases that were over the scenes, but you can still see them pretty good.

This one is a little ice cream shop.

This one looks like a perfume shop.

This one has all sorts of body stuff.

This is the front of one of the stores, and I love the way they did the glass in the window & door.

This one is a scrap booking studio.
I think it is really neat to see how each person made them all so differently. Hanna (my daughter) has decided to make hers into college dorm room. She is still painting hers so I will post it when she is finished. I am still debating what to turn mine into, but I am leaning towards a gardening/potting room. I saw a few of these in the samples & they were pretty cute. I will post photos of those later. But then again, I am also considering just doing a hodge podge of all the things I love to do. who knows.... I am still building it.
There are several more displays that I will post later, along with the raffles that Hanna & I won. (we each won one-that was exciting!) Also I will have to show you some of my purchases and the mini favors that we came home with.
TO BE CONTINUED...
Thursday, April 1, 2010
Well, I finally got a chance to take get some photos onto my borrowed computer.
Below are my first attempt at making candles. I found a tutorial in one of those old magazines from 1992 (I think). So I thought I would try it. They didn't turn out that bad overall, but I think next time I will do it a bit differently. The tutorial calls for using mostly the transparent clay to give it that waxy look, but once that heats up from working with it, it gets really sticky & hard to work with. So next time I am going to find a way to keep the clay cold to make it easier to work with.

The photo's have horrible lighting, but you can get the general idea.


Next are my attempt at mushrooms from the AIM tutorial they had. I had a lot of fun making these, they are so cute. Again the lighting is bad but it is not out of focus. I got the mini wooden pots from my local craft store & painted them Terra-cotta color & they turned out pretty good. This was my first batch & I think I cooked it to long because they actually were a brighter red, but by the time i got them out they were more of a burgundy color. I really couldn't decide if I wanted the spots all over or at the bottom, so they are not all the same.

Same pot, different angle.

This is my second batch. It is a bit out of focus, but you can see the color is much brighter this time.

I am going to make 7 little pots just like the above and give out as table favors at our upcoming State Day event. I sure hope everyone likes them. I am relatively new to all of this and I don't have the level of craftsmanship that most of you guys do, but it sure has been fun learning!
I hope you all have a wonderful Easter!
Subscribe to:
Posts (Atom)