Sunday, March 6, 2011

Cubbies (finally) all finished & potion jars....

Well, I finally finished building all my drawers for my shelf.  I am really glad that is over!  I am very happy with the way they turned out.  Right now they are functional, but not pretty.  Eventually I might paint them or cover them with pretty paper, but for now they will work.  I have been busy sorting & trying to figure out how I am going to organize all of my mini's.  I keep on finding more containers & bags & boxes that have minis in them.... (sigh)  I might have to open a shop just to get rid of some of this stuff I will never use.  Below is my shelf thing completed....


I went to the craft store & found some small wooden threat spools that I ended up using for the knobs on all the drawers.  They worked out pretty good.  You can kind of see the plastic drawers to the right of my shelf unit, I am using those drawers for the larger things, like furniture, glues, paints, stains, pasta machine, etc...  I am using the temporary stickers to label the drawers until I finalize where everything will actually go, then I plan on printing out some pretty labels & make it look a bit more consistent.

I have also finally gotten a chance to play with my resin stuff to try out filling potion jars.  It is much more fun than I thought it would be.  I have only tried 4 different colors, but I do like them, once I figure out how to finish the tops of them, I think they will look great on my spooky hutch.  Below is a photo of a few of the ones I have done....

My son really like the teal one, it reminded him of kool-aid!  The solid red one is supposed to be blood of some sort, but I think I need to tweak the color of that one a bit more... but that is the fun of experimenting!

That is really all I have for now.  Thanks for reading,

Take Care!

Thursday, February 24, 2011

Organizing...

Just a quick post, I know it it has been a few weeks, but I have been busy working on a full size project.  Recently at work they have gotten new office furniture (which has been great by the way) for almost everyone in our office.  They were donating all of the old furniture to local charities (which again, is great), but in the piles & piles of old furniture that were stored out in our warehouse, I spotted this shelf that would be well suited for storing & organizing miniatures.  I asked If I could buy it, but they gave it to me instead!  I was so excited, it is just perfect....


Ok, so this is the shelf.  It is very dusty & the back panel was coming off, so I had to re-nail it, but other than that, it is in good shape.  It is actually an old literature rack so I thought it would be a simple thing to get trays to fit into the slots & that would hold everything I needed it to.  Boy was I wrong!  I did finally find a company that had trays that would actually fit each cubby, but they were 16.95 each & I need 22 of them!  So I decided that I would make them myself out of foam core.  Each cubby is 12" wide x 12" deep x 4" tall.  As you can see in the photo, I have a few of my boxes done ( all the white ones) I was just trying them out to make sure they fit.  I still need to figure out some sort of knobs for the front, but first I need to finish making all the boxes.  Currently I have 10 left to finish.  Hopefully by this weekend I can finish them up.  The really nice thing about making them myself, is that I can add dividers into whichever box I need them in & they should be easy enough to change around.
Well, that is all for now, I need to back to gluing my drawers together....
Take Care!

Wednesday, February 9, 2011

Aging Paper

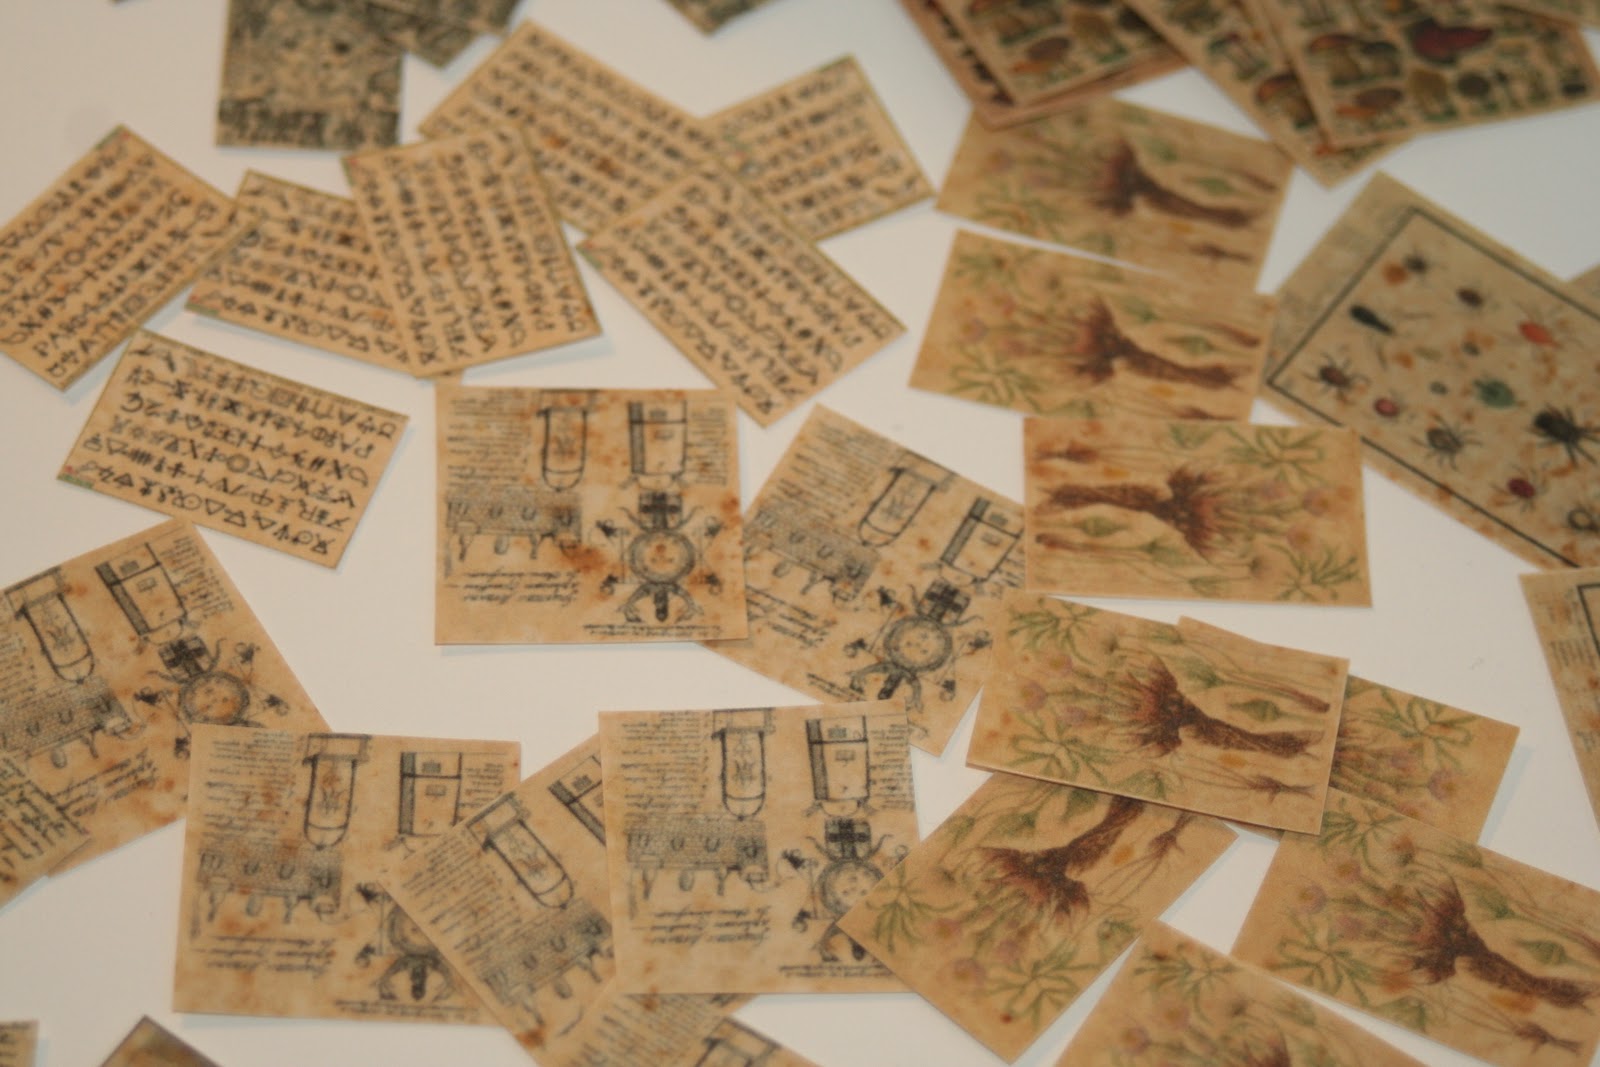
Well, I finally got my first attempt at aging paper sealed & cut finished.  I have actually been done since Sat, but my kids have been sick & work has been crazy busy, so this is the first chance I have gotten to get it posted.  This project was actually a lot of fun!  I really enjoyed "painting" my paper with tea and experimenting with adding coffee & salt... I am really happy with the way they turned out. (You can click them to make them larger)


These are all my little parchments...I have no idea what on earth I will do with all of them, but they sure are cute!


On this one and the next one you can really see the ages spots well... I am most happy with those! 


I think before I actually use them in my scene, I will dirty up the edges a bit or burn them a little to get a more authentic feel to them.  Next time I want to do some little stacks of blank parchment and some scrolls, I think that would a be a lot of fun, and I need some anyway! 
Well, I don't have much spare time, so I will post again soon!

Take Care!

Thursday, February 3, 2011

Magazines Everywhere!!

Recently, I found out that one on the ladies in my miniature club has a subscription to American Miniaturist.  Now when I stopped doing minis 14 years ago,  There was a magazine that I loved called Nutshell News.  At the time, it was the only one I would get because it was such a good magazine.  When I started back up a few years ago, I was sad to find out that they no longer do that magazine, but the new one "American Miniaturist" was close to the type of magazine it was, so I found one & bought it.  I liked it well enough, but never really found it in my budget to subscribe for a year...so when I found out a club member had hers for the last several years, I had asked her if I could borrow some of them just to look through for any interesting projects.  Well, she shows up at the next meeting and brings me this.....
I was so excited, but quickly told her it may be a few months before I could get through all of them... I really only expected her to bring me 5 or 6 of them, which would have been great!  Then she proceeds to tell me that she really never looks at them & she does not want them back... she is giving them ALL to me!  I was speechless to say the least.  I tried several times to have her keep them but she really did not want them anymore, and I really cant get a subscription right now so I gladly took them, and sang "Merry Christmas to me"  all the way home.  I spent the next night sorting and organizing them, and finding a new home for them in my cramped space, and come to find out She had given me 6 years worth of issues and I am only missing 9 of them for a complete set!  It was so amazing, it still makes me smile to think of her wonderful gift!

Take care!

Wednesday, February 2, 2011

Presents in the mail....

I had a little package come in the mail for me on Saturday, and I finally got a chance to photograph it... I HAD to get one of Kats Pirate hats, well, because I just LOVE the Captain Jack Sparrow character....So while in her ETSY store I saw a teal looking witches hat that I think I am going to keep for my long term "The Burrow" project.  I am just really collecting things for it right now & have figured out the ground floor.  Kat, being the wonderful person that she is, put a little something extra in my box which I am so excited to have, & they will go perfectly with my hutch that I am currently working on!!
Anyway, Here are my newest hats....


Yes!  She sent me a little pair of witch shoes!! Aren't they adorable!


Here is a closer picture of the 2 hats, you can see the stitching better on the Jack hat & the details on the teal patchwork hat....


and here is a better photo of the shoes!  I just love them to pieces!

It seems as time goes on, that I become more & more addicted to her lovely little hats!!  I still have to figure out what on earth I am going to do with the pirate hat....  now I have to do a pirate scene....:)  Now I get to learn how to make little fimo pieces of eight!!  LOL  At least I have plenty of empty bottles for the rum.  Wow, I must be getting tired...

Take care!

Friday, January 28, 2011

Random Jars

I have been playing around with filling some of the bottles I have been collecting for the past year.  Most of my ideas for filling revolve around using a resin of some sort, but I have not ordered any yet, So I thought I would play around with some things I already had around the house.  Honestly, most of them looked really stupid, but I did manage to get a few done that I might actually be able to use.  
The photos are a little dark, but not too bad.  You can click on them to make them bigger.


 These 2 jars have the bones in that I posted about earlier.    

These 2 have dried-smushed flowers in them.  The one to the left is a really dark red from red roses & the other is a really pretty lavender color.


These two you can see the colors better & the tops have clay on them right now just to keep the stuff in while I decide how to top them off.  I am probably going to use some jewelry findings & beads to make the tops.  The one to the left is a square shape & the circular one is flat.  I think I like these 2 best       (so far).  :)

This is a part of one of the flowers,but I really liked the way it looked in the jar.  It has good texture.


Here are all of them together.


So far that is all I have done.  I still need to decide what to call them, and then make & attach the labels, but before I can do that I need to learn how to age paper.  I started last weekend and have a few pages that turned out pretty good, so I am going to make more aged paper this weekend & see If I can get some labels & scrolls & random pages to lay about with assorted things on them.  I have some dragons, mushrooms, botanical drawings, ect that I have printed onto the aged paper, but I still have to seal them.  (I just bought the sealer last night) so that should pretty much take up my free time this weekend.

Take care!

Wednesday, January 26, 2011

My Witch Hats....

Well, I have gotten a little side tracked, but I finally did get some pictures taken.  I do not have anything from Christmas to show you, I think I left that at work.  But I will show you my attempt at making a witches hat following Kat-The -Hat -Lady's tutorial, click  HERE to go and try for yourself.  I actually wasn't planning on doing this tutorial for quite some time, (I am trying to stick to my to finish list before I begin anything new) but I was shopping one day and checking the clearance bin, and came across this suede like wallet that would be perfect for a hat for $1.50.

 It was too good of a deal to pass up, so I added one more thing to my list and moved it to the top!  The tutorial was very easy to follow and I didn't have any trouble following the instructions, but doing those little seams in the back was a lot trickier that I had anticipated!  Especially since I could not fit my fingers in there!  I am really particular about my seams being straight, so it took a bit of work, and my tongue had to be sticking out of my mouth just so, but I got there!  I then went to the fabric store & got some trim for the edges.  It is hard to tell in the photo but the one on the left is gold in color.  The one on the right is supposed to be like a fur trimmed hat, but I couldn't get the fur to turn out like I wanted it to be.  The one in the picture is the closest I could get.  After all that, then I got to put the wrinkles in.  That part was pretty fun, but it was hard to decide where I wanted them!  I finally just made a commitment & put the glue inside.  Overall, I really am happy with the way they turned out, especially since I have never done anything like that before. 


I have also been working on filling some bottles for my witch's hutch, but I think I will save that for next time.  I need to go and get some real life stuff done.... oh if only I could live in miniature world for a while....
Take Care!