Wednesday, December 29, 2010

Late Christmas Greetings...

Well, I hope everyone has had a wonderful Christmas getting together with family and celebrating the season! My Christmas didn't turn out quite like I had planned, but it wasn't horrible or anything.
My computer has not been working for a few weeks now we finally got it fixed so I am glad I can get on  post again... :)
Sorry, back to Christmas.... originally We had planned to go and spend Christmas at my Mothers house which is in the Tennessee mountains. ( her house sits on the very top of their mountain) These photos were taken at a previous Thanksgiving, but it will give you an idea...
This is the front of the house


This is the back of the house, my favorite part is the porch that runs the across the entire back


This is early in the morning looking off the back porch into the valley which is filled with fog.


It is a lovely house with breath-taking views, I always enjoy going to visit it is so relaxing. She only lives about 4 hours away, so it is not a long trip, but the weather was supposed to be bad filled with snow ice, so all week long we watched as the forecast changed daily, then on Thursday they were calling for us to get 2"-4"of snow, which means that her snow totals would be at least twice as much as we got. ( she always gets more) So I decided to be a chicken and stay home. I was worried about being able to get home on Sunday if the roads weren't clear and sliding off the side of the mountain.

So anyway, since we were supposed to go up to Tennessee, I did not do any decorating at home. I had not planned any menus or anything!! So we quickly put up a small tree with only lights the angel, went grocery shopping and had a small family Christmas. It was quiet, but nice. We woke up Christmas morning  there was no snow! So now & I am disappointed that we stayed home. My husband decided to go to his family's house with my daughter (about 2 hours away) since the weather was clear. That left my son  I at home to play with our new toys! It was a very quiet relaxing day. Well, then around noon it started snowing and snowing and snowing. (husband & daughter made it home OK) It did not stop until Sunday morning. When all was said done we got around 8" of snow. It was nice to have a white Christmas. We have not had one in our area in about 40-50 years.


This is looking out my front door, down the street in my apartment complex.
(It is always much prettier in person, but I had to put one up here)

I spoke to my Mom on Monday  she was laughing telling me it was a good thing I was a chicken because they were at 18" of snow and counting. It was still snowing there & they were expecting another 1-2"! I was so glad I did not go get stuck. I would be so nice to get snowed in, but I don't think my employer would appreciate me telling them I would miss a few more days right after Christmas break! I all worked out as it was supposed to! The cool thing is, is now we still can look forward to a weekend at my Mom's when the weather clears up with presents! ;)
This post is getting much longer than I had planned and the kids are getting hungry..., so I am going to go,  I will finish this up tomorrow.
Take Care,

Friday, December 10, 2010

A Quick Note....

I have been having computer issues, and hopefully will get them sorted out this weekend! I have missed posting, but hopefully soon I can be back up and running!!

Friday, November 19, 2010

Look what came in the mail!

I have finally gotten my hat that I ordered from Kat the Hat Lady! Actually it came pretty quickly, but I do not do well with anticipation, so it seemed like forever after she told me she had mailed it.. I had it made for my witch's hutch and I absolutely LOVE it!!! She has plenty more to choose from so go check out her blog here.


Kat also included the 2 little pumpkins which are so cute! The lighting in the photo is not to great, but I am still learning how to use my new camera. Thank you Kat! I can use one of them for my hutch! :)


My second little package today from a giveaway that I won from Cate. One of her many talents are the most adorable mini rugs and she was giving one away for Halloween on her blog, and I was fortunate enough to win! Thank you again Cate. You should stop by & see her blog here.


Of course with all of my new minis, I had to try the out to see what they would look like on my hutch. Obviously, it is nowhere near finished, but it is starting to come together a little bit. I need to add potions along with some other things, but I need to learn how to make them first!


Here is a closer shot with the dragon scroll & wand from my previous post. Along with some other pages I have printed out. Not too bad I think..... I want to add some scrolls but I need to learn how to do those as well.


I have been reading through the question & answer blog Ask Tabitha, and I am going to work on aging paper this weekend & see how it goes. There is a lot of good information there. It is a great resource! If there is anything you want to know or learn how to do, then send her your questions & she will get them answered Here.
Well, thats about it for now,
Take Care!

Tuesday, November 9, 2010

I really meant to get this posted last week, but as usual, life likes to interfere with my plans. However, this time it was a good thing. Let me give you a little background info...I have always loved photography as one of my hobbies. When I was in college I worked at a camera store and ended up getting a decent SLR camera along with buying several lenses and accessories to do whatever I was inclined to do. One of which was a macro lens to do well... macro photography. I have gotten some really neat shots with that lens. I was a loyal film camera user for years, but as time went on it got to the point where I could not pretend a digital camera would not be more effective for general family events. So I got a small, point & shoot camera, packed up all my film camera gear and moved on. About 3 years ago, I discovered that the new digital SLR cameras would still accommodate my old lenses, so all i needed to buy was the camera body-but it was very expensive. So I just put it to the back of my mind and let it be. Well, fast forward 3 years and last week I got the opportunity to get a used version of the camera body I had been wanting. My boss was going to upgrade his camera & needed to get rid of his current one, so I was more than happy to help him out!! :) So I have been playing with settings, I built a small little box to shoot mini's in, and have really just been having a lot of fun with my new toy. Hopefully, my photos of my minis' will improve, we will just have to see. :)


I finally got a change to buy a few things, so I thought I would share. My first stop was at Dfly Creations Etsy shop Here. I always love looking through her shop and decided I had to have one of the dragon scrolls. It is so tiny...I love it!!


While looking through her shop, I also decided to get a wand, because, well, every witch needs a wand. Other wise what is the point.. :)


My next stop was over at PD Hartmans Etsy store Here. He has got some hand blown glass, so I thought that a few more pieces wouldn't hurt. Below are 3 little bottles. I have no idea what I will use them for, but I got them anyway.


Of course, I HAD to get the canisters.. who couldn't use glass canisters?


Since I was taking photos with my new toy, I thought I would show you guys some other glass that I have been collecting over the past year. I have become obsessed with miniature glass! I cannot seem to stop buying it.


I'm not sure if you remember, but a while back we had a member of our mini club pass away and her family donated all of her miniatures to the club. We then took up a collection to donate to NAME, and had an auction of sorts to divide up her things to the members of the club. Below is one of my favorite things that I got that day, it is really amazing! I love the detail... I have to shoot it in the plastic box because it is hanging. So the first photo is to give you an idea of size & the second is the detail of the hummingbird.


I have been doing a lot of searching online to find mini things to put in my witch's hutch, so I am slowly but surely collecting those things. I have almost decided to put the hutch in a dome by itself instead of in a scene. But nothing is written in stone. Other than that I am getting ready to start learning how to make potions and get to use some of my glass items I have been saving up. Now that I have a little bit of free mini time, I can start learning some of the things that I have wanted to do.

Take care!

Wednesday, October 27, 2010

MIni Club display is over....whew!

First of all I would like to welcome my new followers, I really hope you enjoy!


Well, this past Saturday we had our Mini club display for a local retirement community. As I told you before they let us meet there for free so we do it for them as a Thank-You every other October. This was my first one, & it was pretty fun. It was neat to see what each person would be drawn to & and what kinds of questions they would have. I had planned on taking photos and posting them here, but I had my daughter take photos of each display while I was setting up & helping others set up & all but one of her photos were badly out of focus! So I only have one to share....this one is 1/4" scale and to give you an idea, the base it is sitting on is about 16" x 20". All the displays were really well done, & it is fun to see what projects other do. (You can click on the photo to make it bigger.)


I displayed my 1/4" room box on my previous post, my toy store which is somewhere in my older posts, and I (sort of) finished my State Day project. It is completed, but it is nothing like I want it to be. Originally, I wanted to make this scene a mosaic tiling studio, but did not have time to do what I wanted to do, I decided to make it into a perfume store as a temporary fix. (Since I had committed to have it at the display) I figured it would be quicker to do the perfume bottles. So I spent all week last week making little bottles out of beads. I think they turned out pretty good for my first time, but it took a lot more time than I thought it would!


Here is the outside of my little shop.


This shows the rafters above the store which will eventually have vines running all the way across and down one side of the building. You will notice the blue tack stuff under all the bottles, but actually, everything in the scene is just tacked down because I plan on removing it all & doing my tiling studio.


Here is the inside of the shop


This one is not good lighting, but you can see the "bottles" better.


I also have been recently searching Etsy for items for my spooky hutch, and came across a shop that sells real little bones. I was really surprised to discover that the shop owner lives in the same town as I do. We wrote back & forth a few times and I HAD to invite her to come to the show. Anyone who loves miniatures loves looking at other miniatures, so I knew she would enjoy the display. It was nice to get to meet her and make a new mini friend. My camera would not take the photo of the bones, so if you want to see them, then check out her Etsy shop: http://www.etsy.com/shop/honeyandbee. She's got some really neat minis there.

Now that the pressure is off, I can play with whichever scene I feel like working on. I am not sure what I want to tackle next... I will have to ponder that for a while!

Take care!

Sunday, October 10, 2010

1/4" Room Finally Finished!

I am finally done with my 1/4" scale room! You have no idea how excited I am to be done with this one! I am happy with how it turned out, although it is in no way perfect, I did learn quite a bit along the way.
I forgot to take the photos with the standard penny in it (for scale,) so I had my son take a quick one with me holding it in my hand so you can see how small it is. You can click on any of the photos to make them larger.....


This box is supposed to be or look like a present, so I covered the outside of the box with some very pale pink paper that is iridescent and had little swirls in it. You can't really tell, but it picks up the pink stripe in the wallpaper inside the room.


This is the front porch area


Here is the inside of the room with all of my furniture (even the stupid crooked chair.. it looked to empty without it), my plant, & a few other things I made to put in for accessories.


Here is a better view of the fireplace wall....


The other wall.....


So, there is one more piece ready for the show next weekend. I do have one more that is supposed to get done, the State Day Project, but I have run into a major snag with that one.... I began gathering all of the bits and pieces I had saved to complete that one, and for the life of me I cannot find the shelving that I had already sanded and painted. All that was left to do was install them. If I cannot find them today, there really is no point in trying to complete that one! I know they are all together in a baggie of some sort, I am just not quite sure WHERE that baggie is. It is times like these that I really wish I had my own space to do my minis in. Then it could be permanently organized & not moved around when the need arises.
Well, That is all for now, Take Care!

Sunday, October 3, 2010

NAME Day Hutch....

On Oct. 2nd, my local miniature club celebrated NAME Day. (National Association of Miniature Enthusiasts). Miniature clubs from all over pre-ordered these hutches in whichever scale they preferred and got together on Saturday to put their hutches together. Our group met at a members lake house and it was a beautiful day. This is my hutch that I completed. I (of course) wanted to do a spooky hutch, so I stained it with black stain, but rubbed most of it off to give it an aged/worn out look. The flash in the photo kind of washes out the color, but i will try to take a better photo when I get to see the sun again. Now I get the fun of filling it up! I am going to do some potion bottles, scrolls, pumpkins, skulls, and any other spooky things I can find.


These are some spooky trinkets I found at my local craft store today in the scrapbooking section. They are actually brads, but I plan on using the skulls as the drawer & cabinet pulls on the bottom. I thought they were perfect! There are a few more stores I have to scout for Halloween decorations next weekend to see if I can find anything else.


That is really all I have for now, I was trying to do some eyeballs tonight, but so far they are not working too well, but practice makes perfect....:)


Tuesday, September 28, 2010

My small success...

as you know, I have been working on my 1/4" scale room box. Tonight I have been working on making a plant to put into my scene. I am really happy with the way that is turned out. The photo is poor lighting, but it is in focus & you can get the general idea. It is sitting on the coffee table from my previous post & the "vase" is a pretty shiny silver. (you can click on the photo to make it larger)


I like the white "flowers" on it, but I think it would be just as good with pink, purple, blue, or any other flower color! I am actually just excited that the whole thing did not fall apart! Please let me know if you have any suggestions on how to improve...

Take care~!

Sunday, September 26, 2010

1/4 Inch scale room

Well, as I told you in my last post, I have several projects that I need to get finished up soon, one of which I am really not inclined to finish at all. I have had so much trouble getting inspired to work on this one. So I decided to get that one finished first & out of the way. I have been working on getting my 1/4" scale roombox done. I had ordered the furniture kits earlier this seek & received them on Saturday. So I stained them & them put them together. Below are the finished pieces of furniture.
(you can click on any photo to make it larger)

This is the mission style chair which I am not really happy about, it did not come out as straight as I wanted it to, but it was my first kit that I had done. I havent decideed if I will actually use it in the room or not.


This is the coffee tabel that goes with the set. It turned out ok, although I did not think the legs would be angled. Oh well.

This is the rocking chair which I got to put on the front porch.

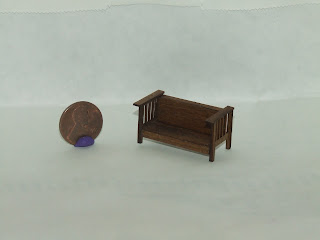
This is the couch in mission style like the others. This one came out the best I think.


Here is the roombox itself. It has a front porch wtih grass on it, but i did not take any photos of it. I Still have a bit of the finish work to do, but the inside is basically done. Then all I have to do is add the furniture.


Here is the fireplace. That was fun to put together! The little logs inside are so small, they fit inside my fingernail.


A friend of mine wants to make the cushions for the furniture, so hopefully that will add a littel bit more to the room. I also found a tutorial for doing some 1/4" scale plants using painted fake eyelashes for the greenery. I will try to work on those this week. When I get them done I will post some pictures.


Well, that is all I have for now. Take care!


Thursday, September 16, 2010

Busy-Busy....

Well, it seems that life is really just trying to kick my butt right now, so I rarely have time to post anything here, but I will keep trying. It may just be random for a while until things settle down here. Both my kids have started new schools, my son starting middle school & my daughter starting high school, so we are just now starting to get into a routine with their new schedules & activities and such. I have also started a new chores routine which we are ALL getting used to, but hopefully that will get easier with time. Work .... is just crazy right now, but as always with business, it is good to be busy! SO, between all of my real life stuff going on, i really am having trouble finding time for miniatures.
I do have several things I am slowly working on at the moment. In our miniature club, we do a show every two years for the residence of the place where we meet. (an assisted living facility) So I am trying to come up with some items to show there. I have my toy store that is done, but we have been working on this 1/4" scale room that they (the club) wants to show as a group, so I am trying to make sure those get done by mid October. I really don't like working in 1/4" scale, but this is my first time so it is slow going. I would also like to finish up our project that we started at state day to display at the show as well, but we will see how that goes.....I had already decided what I wanted to do with my scene, but I don't have time to do that, so i may rough finish it for the show & then redo it later to do what I really wanted to do. I will try to get some photo's this weekend and get them posted. Until then.... take care!

Friday, August 13, 2010

Wow!

I never thought that a week would turn into 3 months!! Summer has been crazy for me. I will be changing the design this weekend when I have more time, but for now I had to add SOMETHING because it was just blank!! My mother will be coming on Sunday to take both kids for a week ( whoopeee!!) so hopefully next week, i can get back on, redesign get updated on what I have been up to!

Monday, April 26, 2010

I just wanted to leave a little note that I will not be posting at least until late next week. I am in the middle of planning & organizing a 3 day camping trip for my Girl Scouts that will be this up-coming weekend. A few years ago I gave complete control of the troop to them since they were old enough. So they make ALL the decisions. Which, I must say, is torture trying to watch a group of 13 & 14 year old girls decide on anything!!! Anyway, they have done their part, so now it is my turn to make sure all the details are covered.
We are also in the process of getting new cars (new to us anyway), so we have gotten the new cars, but still have the old cars, and trying make sure all the paperwork stays straight, I just have to make sure that nothing gets forgotten.

Anyway, I see I have some new followers which I will welcome properly, once all of this chaos has settled down, but until then... WELCOME.

Tuesday, April 20, 2010

My Very first Glass Containers

I know for most, this is not that exciting, but for me, it was. Ever since I started getting back into miniatures and discovered blogging and found people who liked the same type of miniatures that I wanted to do I have been wanting some little glass jars for my scenes. It all started when I accidentally came across Nikki's blog ( http://nikkinikkinikki72.blogspot.com/ ) "Witch and Wizards Miniatures" and I saw all of her amazing potion bottles and various glass jars that she uses to hold all of her magical body parts. From there it did not take long to discover several other blogs with an astonishing amount of wizard type miniatures that I never knew existed. It was very exciting to know I was not the only other Harry Potter freak (in a good way) who also wanted to recreate some of that world in miniature. I also quickly discovered that most of the people that I love their work are professional artists and making these wonderful miniatures are their full time job. This, for me, is a double edged sword. These artisans do such beautiful work that sadly I cannot afford. Not that it isn't worth every penny, its just not in my budget if my children want to eat. So after a few days of my very own pity party that I was not the millionaire that I ought to be (hee hee) I decided that I would just have to learn how do some of these things myself. They may not come out as good as theirs, but I would give it my best shot. Now come the glass bottles. I have fallen in love with all of the mini apothecary themed scenes that I have seen, so I have decided to do my own. Now, as you know, to do an apothecary, you need glass jars. Lots & lots of glass jars. All different shapes, sizes & colors! So, I have now begun my quest of finding all of these glass jars that I will need. I ordered my first 2 jars from E-Bay from a company in England about 2 weeks ago. It has been killing me waiting for them to arrive! (I do not do well with anticipation! Christmas is pure torture for me! :)) They have finally arrived and all in one piece! I used the photos from their site because I could not take one as well as they did.
But now that I have them, I almost feel bad putting eyeballs or brains in them! They are too pretty!! I am sure I will get over that soon enough, but for now, I just look at them and smile.
Wow, I really did not mean to ramble that much, but I really wanted to explain why I am so excited about 2 silly little jars! Today I have ordered 11 more from a different company. Hopefully they wont take as long to get here. We will see.
Thanks for reading!

Wednesday, April 14, 2010

The Last of the Goodies

Well, this is the last of my State Day stuff. First is the last of my clearance bin finds. It is a small glass & wire container that (to me anyway) looks like the perfect beginning to a greenhouse. The inside dimensions are 6" x 8". It is a little smaller than I would like, but it a great one to practice with. I would like to paint it white & then age it a bit, add an aged brick floor and figure out something for the roof. The sides have plexi-glass panels that can be taken out (easier for painting), but the top is all mesh. I would like a glass roof, but I have to ponder that one for a while.


Next we have our raffle winnings. My daughter and I both put some raffle tickets in and we both were really lucky and won. Hanna (dd) won this very bright, festive outdoor scene which she absolutely adores. She wants to add a few more things to it, then we need to find a case for it.


As for me, I won this lamp. (I know this may be really cheesy, but I have wanted one of these since the early 90's when I was doing miniatures before children.) The base of it is a small room box. You can light just the lamp, just the inside of the room box, or both. The lamps total height is only about 24" tall, so it is not too big. The room box inside is 5" squared. It has 2 windows to peek through, and a door.


This is with the back off, right now it is decorated like an entryway, but I plan on changing that.
This is the one I thought would make a cute little apothecary.

The whole back wall (where the dresser & painting are) would be floor to ceiling shelves filled with all sorts of potions and such. There is not much room on the other two walls, but I might be able to hang some random witchy things up there. I would also like to see if I can somehow make the light fixture inside MUCH smaller so it is not so intrusive. I would also like to see if I can fix the door so it will open. Right now it is just decorative.
Anyway that is it for State Day this year. I have plenty of projects to work on & now I have to find some place to find some glass potion jars that won't cost an arm & a leg. I have actually ordered 2 glass apothecary jars that I won on E-Bay, but they are coming from England & it is killing me waiting for them to arrive. Today is the 8th day, so hopefully it won't be much longer. I know when I went to boarding school in England, that packages from home used to take at least 2 weeks, but that was a loooong time ago & the boxes were bigger. :)

Tuesday, April 13, 2010

All My Goodies

Today I am going to post all of my goodies that I got at State Day. The first couple of photos are all of the things that came in the tote bag favors. For those of you unfamiliar with tote bag favors, these are all small little items that people attending the event made or bought 100 of their items to share with every participant there. generally people try to make items that could possibly be used in the project you are there to work on, but not always.


Items as listed: a ribbon windsock, a wooden screen, some magazines, 2 planters, 1 plant, lays potato chips, rubber bands, office folders, office paper, pencil, cat food, clock, coffee creamer& sugar packet, journal, hinges for the door, stamps, mailbox with mail.


A small wooden bench for outside, a flower box, an apron, a small wooden sign with hardware to hang outside of your store. (with room for you to personalize it)


Next are table favors which are ones that you only exchange with the people you have at your lunch table. I gave out my mushrooms to my lunch table people.


Random groceries with grocery bag, a lady bug (on the yellow piece of paper), a small tray for mixing paint, some children's building blocks, a cube with a clip on it, a craft knife that goes around your finger ( I am curios to try this one) in the Altoids tin is a desk set with a desk calender, a notepad, a to do list pad, some post it notes, & a pencil cup with 3 pencils inside, a chair that has been primed to be painted to put into your scene, The last item is in photo below...


This was a gift from the host club for everyone to use, a cup of coffee & plate of doughnuts, the plate says "My Little Corner" across the top & 2010 across the bottom. Very cute.


Next are some items that I purchased. A few of the vendors (there were only 7 or 8) had clearance boxes so of course I hit those first! I got the rocking chair for $3.00 & the set of 4 chairs for $4.00. The 4 chairs are going in the Weasley kitchen. Of course I have to re-paint them & age them quite a bit, maybe break a couple of spokes on the backs, I haven't decided yet. The rocking chair I plan on putting in Molly & Authors bedroom. I really think Molly deserves a rocking chair. One that I am sure she rocked all of her babies in. I also found year two Hogwarts school books which of course you know Had Gilderoy Lockharts books which (again) you know, Molly would own all of them since she fancies him. :)


That is all for now. I really didn't get to purchase much, my budget really wont allow it, but I figure if I get a little bit at a time, eventually (possibly when the house is built) I will have most of what I need.
I have 3 more things to show you tomorrow & that will end my adventure at NC State Day.
Thanks for reading!